How to Throw Darts — Grip, Stance & Technique
Here's the thing about throwing darts — it's not complicated. It's basically throwing a paper aeroplane at a wall. But doing it the same way every single time? That's what takes practice. This guide breaks down every part of the throw so you can build good habits from the start instead of spending months fixing bad ones.
The Throw — Overview
Throwing a dart is a simple motion. You could teach a child to do it in 30 seconds. But doing it the same way every time — that's what separates someone who occasionally hits treble 20 from someone who hits it on demand. The good news? Darts doesn't need strength, speed or athleticism. It's pure repetition and muscle memory. Build good habits and your body does the rest.
Every throw breaks down into five stages:
| Stage | What Happens | Key Focus |
|---|---|---|
| 1. Grip | How you hold the dart | Firm but relaxed — no white knuckles |
| 2. Stance | How you position your body | Still and balanced — only your arm moves |
| 3. Aim | How you line up the dart | Dart at eye level, tip on target |
| 4. Release | How you let go | Smooth acceleration, clean finger release |
| 5. Follow-through | What your arm does after | Fingers point at the target, arm extends |
How to Grip a Dart
The grip is where everything starts. It's how you connect with the dart, and it affects everything — your control, your release, your accuracy. There's no single "correct" grip. Pros use anything from 2 fingers to 5. But there are principles that apply no matter how you hold it.
The Basics
- Thumb underneath — your thumb sits on the underside of the barrel. It's the support, the foundation. It's the most important finger in your grip
- Index finger on top — rests on top or slightly to the side. This is your direction finger — it guides the dart
- Middle finger for stability — sits alongside or behind the index finger. Adds balance and control
- Ring finger (optional) — a 4th finger adds stability but can make the release less clean. Use it if it feels right, don't force it if it doesn't
- Pinky stays away — if your pinky is touching the barrel, you're using too many fingers. Let it float or tuck it in
Grip Types
| Grip | Fingers Used | Pros | Cons |
|---|---|---|---|
| 3-finger | Thumb, index, middle | Cleanest release — most popular among pros | Slightly less control than 4-finger |
| 4-finger | Thumb, index, middle, ring | More control and stability | Release can be messier |
| Pencil grip | Like holding a pen | Feels natural for most people immediately | Limited barrel contact |
| Front grip | Fingers near the point end | More dart ahead of your hand, stable flight | Less barrel to hold onto |
| Rear grip | Fingers near the shaft end | More leverage, can generate more speed | Less stable, harder to control |
Holding on too tight. Your grip should be firm enough to control the dart, but loose enough that someone could pull it from your fingers with a gentle tug. A death grip tenses up your whole arm — hand, forearm, shoulder — and destroys your accuracy. If your knuckles are going white or your hand cramps after a few throws, ease off.
How to Stand (Stance & Feet)
Your stance is the base everything else sits on. If your body is moving, swaying or wobbling, your arm can't deliver the dart to the same spot twice. A good stance is still, balanced and comfortable. That last one matters more than people think — if you're uncomfortable, you're tense, and tension kills accuracy.
Foot Position
Dominant foot forward
Right-handed? Right foot forward. Left-handed? Left foot forward. Your front foot should be touching or right up against the oche. This gets you as close to the board as possible without crossing the line.
Turn your body sideways
Don't face the board square-on like you're about to charge at it. Turn 45-90 degrees so your throwing arm is the side closest to the board. Most players settle around 45-60 degrees. Some go fully sideways. Experiment and see what feels natural.
Weight on the front foot
About 60-80% of your weight goes on your front foot. Your back foot is just there for balance — some players barely touch the ground with it. Lean slightly into the throw but don't lean so far that you're off balance. If you feel like you might topple forward, you've gone too far.
Stay completely still
This is the big one. Your body should be rock solid during the throw. No swaying, no rocking, no stepping. Only your throwing arm moves — from the elbow down. Everything else is locked in place. If your body moves, you're adding variables that make your throw less consistent.
The Three Common Stances
| Stance | Body Angle | Best For | Used By |
|---|---|---|---|
| Front-on | ~45 degrees | Beginners — most natural, easiest to balance | Most recreational players |
| Side-on | ~90 degrees | Precision — gets your eye directly in line | Phil Taylor, Adrian Lewis |
| Angled | ~60 degrees | Balance of stability and line-of-sight | Michael van Gerwen, Luke Humphries |
Stand at the oche and close your eyes. Shift your weight around until you feel completely balanced and comfortable — like you could stand there for 10 minutes without moving. Open your eyes. That's probably your natural stance. Don't copy a pro's stance because it looks right. Your body knows what's comfortable. Start there and adjust from that point.
How to Aim
Aiming in darts isn't like aiming a gun. There's no scope, no crosshair, no laser sight. It's more instinctive than that — closer to throwing a ball at a target than precision engineering. But there are techniques that help you line things up consistently.
The Sighting Method
Bring the dart up to eye level
Hold the dart in front of your face at eye level. It should sit between your eyes and the target. This is your starting position before every single throw. Same position, every time.
Use the dart tip as a sight
Line the tip of the dart up with exactly where you want to hit. Aiming at treble 20? The dart tip should visually overlap with that segment. You're essentially pointing at the target with the dart itself.
Figure out your dominant eye
Most people have one eye their brain prefers for aiming. Quick test: make a small triangle with your hands at arm's length, look at a small object through the triangle, then close one eye at a time. The eye that keeps the object in the triangle is your dominant eye. Line the dart up with that eye.
Aim small, miss small
Don't aim at "the 20 area." That's too vague. Aim at a specific wire, a specific mark, a tiny spot within the treble 20. The smaller your target, the more focused your throw becomes. Pros don't aim at segments — they aim at specific points within segments.
Your elbow should point directly at the board and stay as still as possible. Think of it as the hinge — everything below it swings, everything above it stays locked. If your elbow drifts left during the throw, your dart goes left. If it drifts right, dart goes right. Keep it still and pointing at where you want the dart to go.
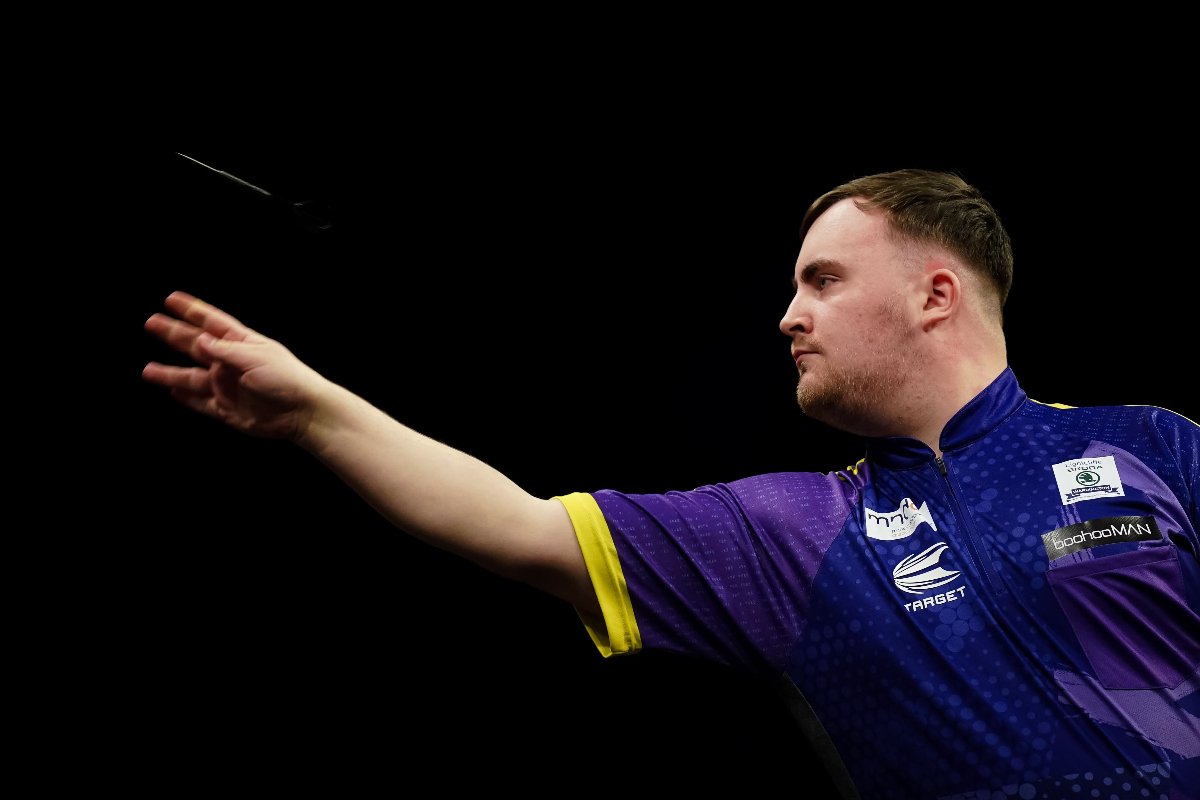
The Throwing Motion
The throw itself is surprisingly simple once you stop overthinking it. It's the same motion as throwing a paper aeroplane — smooth, controlled, no force required. If you're straining or tensing up, you're doing too much.
Step by Step
Set position
Dart at eye level, tip on target, elbow pointing at the board. Your upper arm should be roughly parallel to the floor or slightly raised. This is your start point — same position every throw.
Pull back
Bend at the elbow and bring the dart back towards your face. The tip should come back to around your cheek, chin or ear — wherever feels natural for you. Your upper arm and elbow stay completely still. Only your forearm moves backwards.
Push forward smoothly
Extend your forearm forward. The power comes from your elbow and wrist — not your shoulder. Think of your upper arm as a fixed crane and your forearm as the moving arm. Accelerate smoothly through the throw — don't jerk, don't snap, don't force it.
Flick your wrist
As your arm extends, add a subtle wrist snap right at the end. This gives the dart extra speed and a bit of spin without needing to throw harder. It's a small movement but it makes a noticeable difference. The wrist flick is what separates a flat throw from a good one.
Let it go
Let the dart leave your fingers naturally as your hand opens. Don't try to guide it, don't try to steer it, don't push it. Just let go. Your fingers should open and the dart should slide out — not get flicked, not get shoved, just released.
What Should Move — And What Shouldn't
| Body Part | Should It Move? | Why |
|---|---|---|
| Fingers | ✅ Yes — open to release | Let the dart go cleanly |
| Wrist | ✅ Yes — subtle flick | Adds speed and spin |
| Forearm | ✅ Yes — extends forward | This is where the throw comes from |
| Elbow | ⚠️ Barely — slight rise is OK | It's the hinge. Keep it as still as you can |
| Upper arm | ❌ No | Should be locked in place |
| Shoulder | ❌ No | If your shoulder is moving, you're using way too much force |
| Body/torso | ❌ No | Swaying changes your release point every throw |
| Feet | ❌ No | Stepping or shifting weight makes nothing consistent |
The Release
The release is the split-second the dart leaves your fingers. It's the most critical moment of the entire throw and it happens in a fraction of a second. A clean release sends the dart where you aimed. A messy one sends it anywhere but.
How to Release Cleanly
- Open your fingers — don't flick — the dart slides out as your hand opens naturally. You're not pushing it, snapping it or launching it. Just... letting go
- All fingers release together — if one finger holds on a fraction longer than the others, the dart spins off sideways. Practice releasing so everything lets go at the same instant
- Release at the right moment — too early and the dart goes high. Too late and it drops low. The sweet spot is when your arm is almost fully extended and pointing at the target
- Same release point every throw — this is what makes your darts consistently land in the same area. Same grip, same motion, same release point. Every time
Stand at the oche and throw with your eyes closed. Seriously. Don't aim — just focus on how the dart feels leaving your fingers. Is it smooth? Does one finger stick? Does the dart wobble as it leaves? This drill strips away the visual pressure and forces you to feel the release. Do it for 5 minutes before each practice session.
The Follow-Through
The follow-through is what your arm does after the dart is gone. The dart has already left your hand so it can't possibly matter, right? Wrong. A good follow-through proves your throw was on line. A bad one proves it wasn't.
What Good Follow-Through Looks Like
- Arm fully extended — after release, your arm keeps going until it's completely straight, pointing at the board
- Fingers pointing at the target — wherever your fingers end up pointing is where your throw was actually aimed. If they're pointing left of treble 20, your throw went left. Simple self-diagnosis
- Hold it for a beat — keep your arm extended for a moment after the dart lands. This trains muscle memory and stops you from yanking your arm back too soon
- Relaxed hand — your hand should be open and loose after release. If it's clenched or tense, you didn't release cleanly
Common Mistakes
Every beginner makes these. The sooner you spot them, the sooner you stop building habits that'll take months to undo later:
Gripping too tight
White knuckles = bad darts. A death grip tenses up your hand, forearm and shoulder — everything that needs to be relaxed for a clean throw. Ease off. The dart isn't going anywhere.
Throwing with your shoulder
The power comes from your forearm and wrist. If your shoulder is doing the work, you're using way too much force and your throw will be all over the place. Your upper arm should barely move.
Moving your body during the throw
Swaying, rocking, stepping, leaning — all of it changes where the dart goes. Your body is the platform. If the platform moves, the throw changes. Lock everything in place and let your arm do the work.
Skipping the follow-through
Pulling your arm back the instant the dart leaves means you were already slowing down before the release. Follow through every single time — extend your arm fully and point at the target. It feels weird at first. Do it anyway.
Throwing too hard
Darts is not about power. At all. Throwing harder doesn't make the dart more accurate — it does the exact opposite. A smooth, controlled throw with moderate force beats a bullet throw every time. You're throwing at a board 237cm away, not launching a missile.
Adjusting between darts
Your first dart goes left so you change your grip for the second. Now the second goes right so you shift your stance for the third. Stop. Don't adjust mid-turn. Stick with your technique, throw all three the same way, and make adjustments between turns if needed. Constantly tweaking creates chaos.
Aiming at the whole segment
"I'm aiming at 20" is too vague. Aim at a specific tiny point within the treble 20. A wire. A mark. A spot. The smaller your target, the more focused your brain becomes and the tighter your grouping gets.
Practice Routines That Actually Work
You can read about technique all day but nothing replaces throwing darts. Here are the routines that actually make a difference — used by players at every level from beginners to professionals.
Beginner Routines
🎯 20s Practice (10 minutes)
Just throw at the 20 segment. Not treble 20 specifically — anywhere in the 20. Focus on grouping your three darts as close together as possible. Don't care about score, care about consistency. Can you get all three in the same postcard-sized area? That's the goal. This builds muscle memory for the most important part of the board.
🔄 Around the Clock (10 minutes)
Play Around the Clock — hit 1 through 20 in order, then the bull. Forces you to aim at every part of the board instead of just hammering treble 20. Count how many darts it takes and try to beat your record. You'll be surprised how quickly it drops.
🎯 Doubles Practice (10 minutes)
Go around the doubles — D1, D2, D3, all the way to D20, then bull. Doubles win games and they're the hardest shots on the board. Most beginners never practice them and wonder why they can't finish. Start early and you'll be ahead of everyone.
Intermediate Routines
📊 100 Darts at Treble 20
Throw 100 darts at treble 20 and count how many hit. A beginner might get 5-10. A decent club player hits 20-30. A professional hits 40+. Write the number down and track it weekly. Watching that number go up is addictive — and proof that practice works.
🏁 Checkout Challenge
Start at 100 and try to check out in as few darts as possible. Once you finish, go again from 100. This simulates real game pressure because you're practising both scoring and finishing under the same conditions you'd face in a match.
🎯 Bob's 27
The classic. Start with 27 points. Aim at D1 — hit it and add 2 to your score. Miss all three darts and subtract 2. Move to D2, then D3, all the way to D20 and bull. If your score hits zero, you're out. Over 27 is decent. Over 200 is excellent. Over 400 is professional level. It's brutally honest about how good your doubles really are.
Keep a simple log. Your 100-dart count at treble 20. Your Bob's 27 scores. Your Around the Clock dart count. What gets measured gets improved. You'll think you're not getting better — then you'll look at your numbers from 3 weeks ago and realise you've improved massively. The data doesn't lie.
What the Pros Do
Every professional player throws differently. That's the first thing to understand. There is no single "correct" way to throw — there are fundamentals that most pros share, but the details are all personal. Here's what you can learn from watching the best:
| Player | Grip | Stance | What Makes Them Different |
|---|---|---|---|
| Michael van Gerwen | 3-finger front grip | Angled, leaning forward | Unbelievably quick. All 3 darts thrown in under 10 seconds. Pure rhythm |
| Phil Taylor | 3-finger, mid-barrel | Side-on, very still | Closed one eye to aim. Minimal wrist. Almost pure arm throw. 16 world titles |
| Luke Humphries | 4-finger grip | Angled, stable base | Methodical and deliberate. Takes his time. Same routine every single dart |
| Luke Littler | 3-finger grip | Slightly front-on | Ridiculously smooth for his age. Quick but controlled. Natural talent |
| Peter Wright | 4-finger front grip | Side-on, close to oche | Very short shafts and tiny flights. Flat, direct trajectory. Unique setup |
| Gary Anderson | 3-finger rear grip | Relaxed, slight lean | The smoothest throw in darts. Makes it look completely effortless |
Look at that table. Phil Taylor was side-on and closed an eye. MvG is angled and keeps both open. Gary Anderson grips the back of the barrel. Peter Wright grips the front. They've all won world titles. There is no perfect technique — only YOUR technique, repeated until it's second nature. Find what feels right, drill it every day, and trust the process.
Frequently Asked Questions
How do you hold a dart properly?
At least three fingers — thumb underneath as support, index and middle finger on top for control. Grip firmly enough to stay in charge but loose enough that someone could pull the dart from your hand with a gentle tug. If your knuckles are white, you're gripping way too hard.
How should you stand when throwing darts?
Dominant foot forward, touching or close to the oche. Turn your body 45-90 degrees so your throwing arm is closest to the board. Most of your weight goes on the front foot. The key thing is staying completely still — only your throwing arm moves. Everything else is a statue.
How do you aim in darts?
Bring the dart up to eye level and use the tip as a sight — line it up with exactly where you want to hit. Your elbow should point at the board and act as the hinge. Don't aim at "the 20" — aim at a specific tiny spot within the treble 20. Smaller target, better focus, tighter grouping.
What is the correct throwing technique?
The throw comes from your forearm and wrist, not your shoulder. Upper arm stays still. Pull back to around your cheek, push forward smoothly, flick your wrist at the end and release as your arm extends. Follow through by pointing at the target. Think paper aeroplane — smooth and controlled, not forced.
How can I get better at darts?
Practice regularly. 30 minutes a day beats 3 hours once a week. Focus on one thing at a time — don't try to fix your grip, stance and aim all at once. Play Around the Clock to learn the board. Track your scores so you can see yourself improving. And build a routine — same stance, same grip, same throw, every time.
Should I throw hard or soft?
Neither. Throw with a smooth, controlled motion and just enough force for the dart to reach the board in a gentle arc. Too hard = tension = bad accuracy. Too soft = dart drops short. Paper aeroplane energy. Smooth acceleration, clean release, let it glide.
How many fingers should I use?
Most players use 3 or 4. Three (thumb, index, middle) gives the cleanest release and is the most popular among pros. Four adds more control but can make the release messier. Start with 3 and only add a 4th if it genuinely feels better. Pinky should never touch the barrel.
Why do my darts keep going left or right?
Almost always one of three things: your elbow is swinging instead of staying still, you're releasing too early or late, or your follow-through is pulling sideways. Fix it by locking your elbow in place pointing at the board, and checking that your fingers point straight at the target after every throw.
Related Guides
🎯 Get Your Daily Darts Fix
Visit Darts Daily for daily player profiles, trivia, stats, news and upcoming events from the world of professional darts.
Visit Darts Daily →